Have you ever had a bad coach? Think back to middle school or high school. That coach that constantly barked orders, never listened, and rarely if ever, showed you the proper way to do things left a bad image in your mind. Was that relationship beneficial for you? Most likely not.
As a Safety Professional one of your primary functions is coaching employees on safety practices and procedures. Let’s discuss what coaching is, the benefits of coaching, the proper way to coach, and how to avoid becoming your old high school football coach that you have etched in your mind every time you hear the word coach.
What is Coaching?
Coaching is the act of observing and engaging individuals regarding their actions and behaviors, in order to achieve a desired behavior. Remember, a good coach does not simply throw his starters into the game and wish them luck. It is YOUR job as a coach and safety professional to guide, teach, motivate, listen and directly express the overall end goal.
Why Coach?
Coaching is a type of positive reinforcement (giving praise to someone for taking a desired action). Positive reinforcement is statistically proven to produce a more engaged, and positive workforce. Changing behavior is one of the most challenging tasks a safety professional has. Coaching allows you to engage your workforce in a positive manner, and produces an open communication between field employees and management.
Benefits of Coaching Safety
Empowers individuals and encourages them to take responsibility.
Increases field team and management engagement.
Improves individual performance.
Helps identify both company and individual strengths and development opportunities.
Helps to motivate individuals.
How to Coach and Engage Your Field
Coaching itself is actually very simple but it’s not always easy to do. Personalities, time pressure, and relationships can all come in the way of coaching. Keep reading for the steps of how to coach.
Steps of Coaching
Let’s outline a good way to coach an employee:
Observe the action being performed.
When you see the opportunity for improvement, professionally engage the team member.
If the action or condition is unsafe, Stop the activity using Stop Work Authority if needed.
Explain what you observed in a positive, respectful, manner. Be objective and explain the facts. Avoid using accusatory phrases such as “ Why were you, (insert action)?!”
Try to utilize phrases such as, “Hello John, you have been doing a great job with your day to day tasks. I observed you performing (insert undesired action). Can you explain why you were doing it this way?” I was looking for some clarification on the proper way how to perform the task and could use some help”.
Listen to the individual’s feedback. Often times, hazards are simply overlooked or not identified, resulting in unforeseen unsafe acts.
After listening, thank them for their input. Next, provide the desired behavior using coaching. Explain the benefits of using the safe alternative. As example: “Sure it may take 5 extra minutes to perform that safety check, however that safety check could be the one thing that prevents an incident from occurring.”
Get confirmation from the employee that you have both agreed that the next time the task will be performed, it will be the safe way.
Observe the next time the individual performs the task if possible. Be sure the individual understands you are coaching and not throwing around orders.
Coaching requires willing participation by both parties; be sure the individual you are coaching is properly engaged and understands your intentions. Get to know your people, find commonalities, and utilize different approaches for each individual.
Overcoming Objections
Coaching rarely goes over as smoothly as we just illustrated. As a safety professional, you want to avoid the stigma of “It’s my way or the highway!” Here is a great way to think about this problem:
2+2=4
1+3= 4
Just because an employee is not doing it “your way”, does not mean it is necessarily wrong. (Unless there are specific Standard Operating Procedures (SOP) or a Policy/Regulation stating otherwise). Often times the best solutions come from the field. Listen to their feedback. The employee may actually teach you something and provide a safer solution than the current set of procedures.
Avoid Saying These Phrases
Delivery is important when providing coaching so avoid these phrases when you are coaching.
“It’s not me telling you this, its just our policy”.
You lose all credibility as a safety professional when you say this. Rather than rolling over to a bad policy, bring up the concern to management if there is a policy/procedure that is not successful and find a solution together.
“It’s o.k. just be careful”
Again, your credibility as a safety professional is shot. You may have saved some face and the field may like you for not enforcing the rules, but when someone gets hurt or something goes wrong, the blame is now pointed to you for making the call to not enforce the rules.
“What are you stupid?”
Pointing blame at someone for acting unsafe is not beneficial to anyone. Often the employee was simply unaware that what they were doing was unsafe. There is an old saying, “You don’t know, what you don’t know”. If the employee is experienced and in fact is aware the action is unsafe, simply explain the consequences of what could happen. Let them know you care about them enough to not let them put them self at risk. Explain that you both have a common goals of everyone going home safe to their family after work ends.
Providing Feedback
The final step of coaching is providing feedback. If you are not showing appreciation for the change in behavior, you can be certain that the employee will fall back in to their old habits. Giving praise can come in a few different forms such as:
Individual praise
Group recognition
Picking up lunch for the crew for following safety procedures
Hats and tee shirts also go a long way when giving praise
Hand writing a letter for recognition
Spotlighting the employee’s efforts at company meetings
etc
Not everyone responds to feedback the same way. Some people would prefer to not be recognized in a group setting, so let the person know how you would like to recognize them before doing so.
Final Thoughts:
Coaching is an ongoing process and it takes time to change behavior. When coaching safety in the workplace make sure to explain the facts, and potential outcomes of each action taken. Follow up with employees and acknowledge when a task is done correctly..
Did this article help? We hope this toolbox talk was informative, helpful and easy to relate to. Please visit B42L.com to learn more about Coaching Safety and other Safety Topics to improve your company’s safety culture.
A message from Lucas Boyd, CEO. Starting off the 2019 calendar year, the B42L team has been busier than ever and we are happy to have accomplished trainings in the Energy, Construction, Manufacturing, Higher Education, and Private business sectors. Here is what we have been up to.
Campus Ambassadors
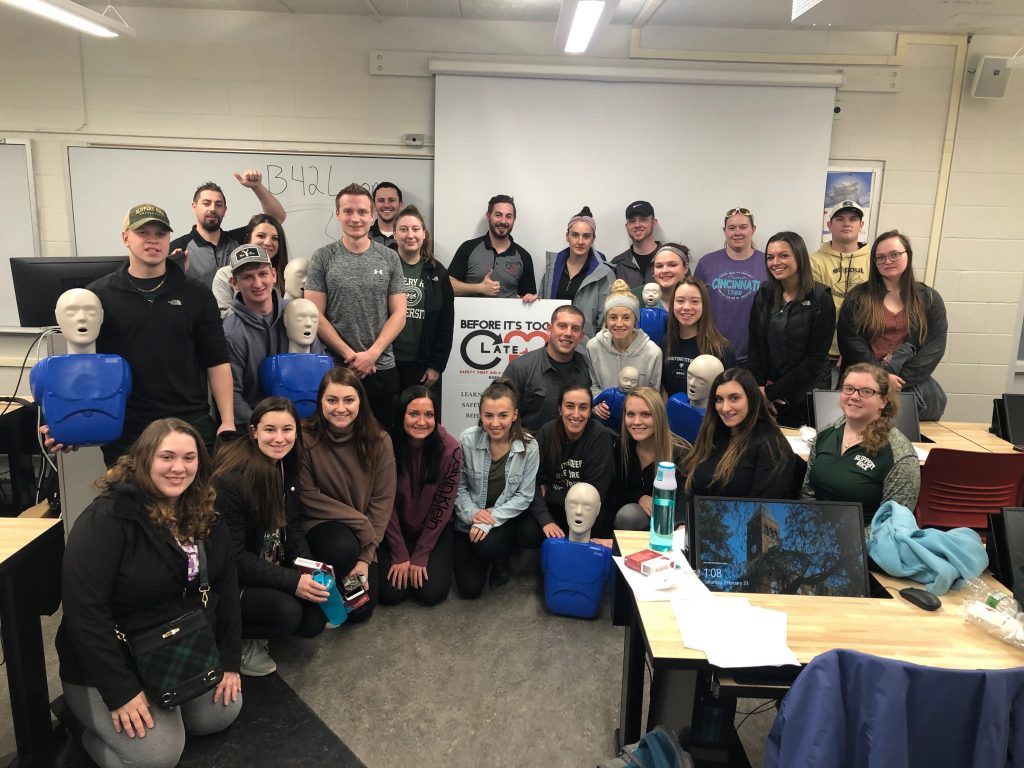
Moving into 2019 and continuing the Campus Ambassador Program the B42L team was able to invest in their ambassadors. Both Damon Morris and Jovi Ryder of Slippery Rock University, were put through the American Red Cross Train-the-Trainer Program and are now able to teach Basic First Aid, CPR/AED classes for the B42L team. In recognition of each’s accomplishments, a Special Encore Training Slippery Rock University has been scheduled for March 30th 2019 on Slippery Rock University’s Campus. Both Damon and Jovi will be leading chapters during the training and putting their certifications to use! You won’t want to miss this debut! Click to sign up below:
https://dev.b42l.com/student-scheduling/
Over 120 students were trained in the 2018-2019 school year at SRU!
We are searching for 1 new campus ambassador for the 2019-2020 school year! The Campus Ambassador program also is a financial assistance program that aids, providing a $500 scholarship to its participants. For Safety Management Students, this is a great resume builder and a great way to grasp what all goes into setting up, scheduling, and conducting a safety training! Are you interested in applying for a campus ambassador role? Submit your application here!
https://dev.b42l.com/campus-ambassador/
B42L: Energy, Engineering, Education
Construction: Continuing to build bridges with American Bridge!
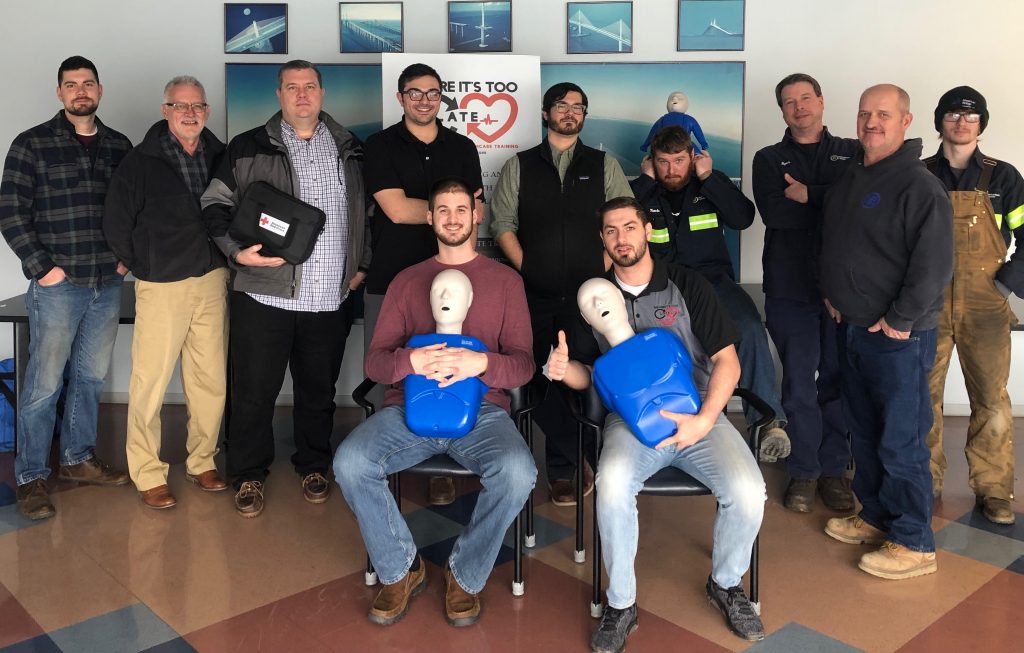
In early March, the B42L team was invited back to American Bridge Company to conduct more training for their staff. Led by SRU graduate, Brant Weiteich, these American Bridge participants learned life saving skills that they will be prepared to employ, given any of the emergency situations we discuss during our training’s! Hats off to Brant for leading this initiative and inviting us back to train! We look forward to continuing to build bridges with this amazing group!
American Bridge has worked with B42L for 3 years! We are happy to have this relationship with of of the worlds most prestige bridge engineering groups!
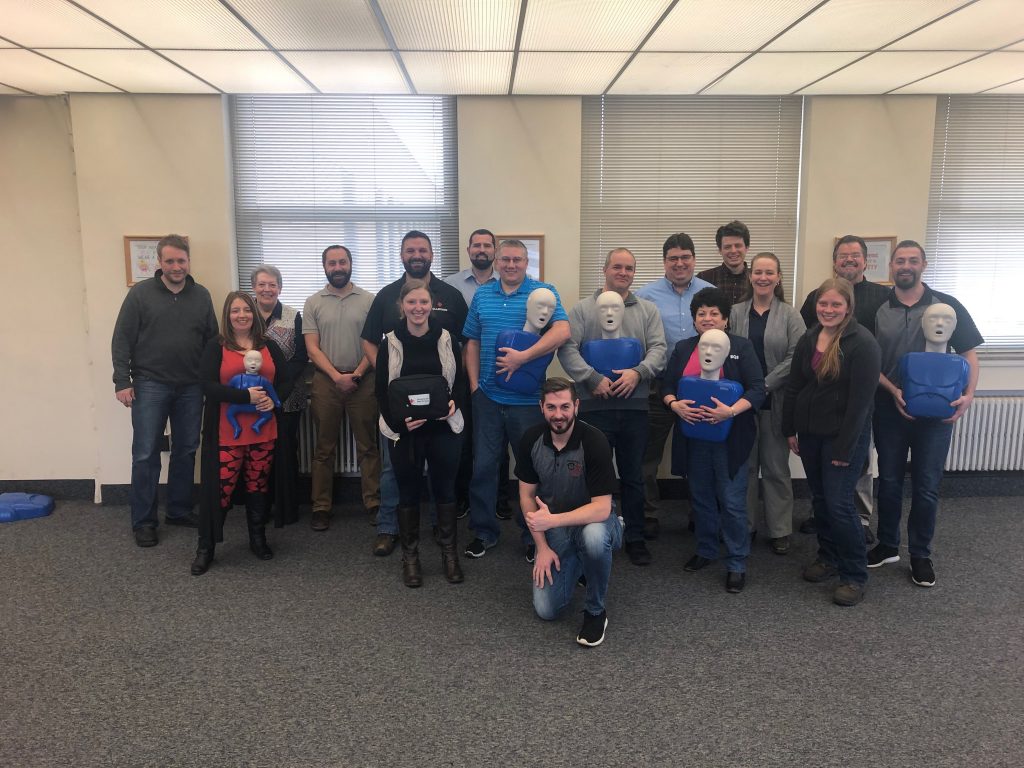
Manufacturing: Saint Gobain Plastics
Another Slippery Rock University Safety Management Alumni, Andrew Proya, invited the B42L team into Saint Gobain Plastics Manufacturing just outside of Cleveland, OH. These leaders at Saint Gobain not only talked-the-talk, but they 100% walked-the-walk. The group of nearly 30 safety leaders all learned life savings skills and can trust one another that given an emergency, each will be prepared step up and refuse to be a bystander. For the full story click the link below!
Steel Manufacturing: The Elwood Group is a Safety Focused Group!
Slippery Rock University Safety Management Alumni, Bobbie Myers, recruited the B42L team to train over 25 volunteers at Elwood Quality Steel’s New Castle Plant. This volunteer-based training saw awesome turnout and over 25 participants spent their Valentines Day with the B42L team to learn skills of First Aid, CPR/AED. Although we don’t provide emotional heartache training (yet), the team learned how to respond to heart attacks, and the steps to take if someone is suffering from cardiac arrest. The Ellwood group plans on getting more of their plants trained by B42L and is working to schedule each location out! Check out the full story here!
Ellwood Quality Steel employees receive CPR/AED/First Aid Training!
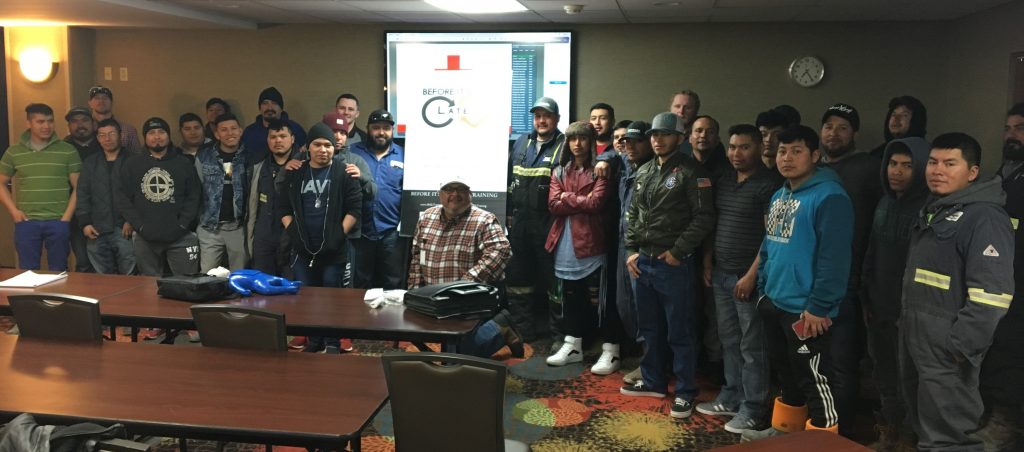
Energy/Oil and Gas: Newpark Mats and Integrated Services
By far the biggest and most dynamic training B42L has conducted yet, Newpark Mats and Integrated Services provided the B42L team the amazing opportunity to train over 200 participants in skills of First Aid, CPR/AED! Training’s took place in Cuddy, PA, St. Clairsville, OH, and Clarksburg, West Virginia. The B42L team, lead by John Cragg, and Lucas Boyd, completed the training in several sessions working around the clock and traveling to each location to get the job done. The B42L utilized translators to also provide the classes in Spanish to over 70 employees. We are proud to have worked with Newpark, and we can confidently say that Newpark is a true leader when it comes to emergency preparedness.
Over 70 Spanish speaking employees were trained in life saving skills!
Partnership with CPR LifeWrap
We came across Felicia Jackson’s story and needed to help spread her mission, “Empowering people to save lives.” Felicia, is the Inventor & Owner of the CPR Life Wrap, a tool used to make CPR easier. The life wrap is made with latex-free, medical-grade plastic, and provides visual prompts to guide the rescuer through the four AHA-recommended steps of CPR. B42L has partnered with CPR LifeWrap and is able to offer the tool to our audience. During a cardiac emergency situation, the Life Wrap gives the lay responder assurance that they will not miss a step when providing CPR. Purchase this life saving tool for your household below.
https://dev.b42l.com/shop/product/cpr-wrap/
Looking Ahead
2019 has started off to an incredibly fast paced start. We look forward to building more relationships and serving our community. As we continue to grow, we want to say thank you to everyone who has joined us in our mission to SAVE LIVES and ask that you continue to help spread our message #BEFORE IT’S TOO LATE
Remember
playing Super Mario growing up? After collecting coins and stepping on Goombas
and turtles Super Mario continued his conquest to save dear Princess Peach. He
approached a tube. You pressed down on the joystick and down he went. What did
we forget to do? A confined space entry assessment. Mario could have died!
So what is a confined space?
By definition a
confined space has three unique characteristics:
It is large enough to enter and work
Has limited or restricted means for entry or exit
Is not intended for continuous human occupancy
So yes, that pipe
Mario dropped down into had one way in, and one way out (limited access/egress).
Let’s continue to read to see what other
hazards Mario faced.
What are the hazards of confined spaces?
Confined Spaces
are inherently hazardous places you wouldn’t want to just hang out. Before
entering any confined space, you must evaluate the space and determine if it isPermit
Required or Non-Permit Required.
Non-Permit Required Confined Space
These spaces fit
the definition of a confined space, however there are no additional hazards.
Permit Required Confined Space
A Permit
Required Confined Space is a confined space that also contains or has the
potential to contain additional hazards including:
What are some real-life examples of confined
spaces?
Tunnels
Wells
Manholes
Tanks
Culverts
Silos
Vaults
Open
trenches/Holes greater than 5ft in depth (vertical spaces)
Cellars
Etc
So yes, we can
confirm that Mario was for sure in a Permit Required Confined Space.
We
can guess that tube was greater than 5ft
It
also had limited oxygen levels. I don’t remember seeing any windows or
ventilation
Bowser
was down there. He shoots fire from his mouth.
What to do if I come Across a Confined
Space?
First and foremost
you need to identify if the space is Permit Required or Non-Permit Required.
Conduct a hazard assessment to identify all possible hazards the space has.
“So I’ve determined it is Permit Required”
What Mario should have done!
Before entering
any permit required confined space there are a few things to do.
Identify
and document the hazards of the space (Normally this is filled out on a checklist/permit)
Test
the air for oxygen levels, combustibility, and toxicity in that order
Ventilate
the space if needed. Retest the air after the space has been ventilated and periodically
while work is being performed.
Lockout
any equipment in the area that could start up and cause harm
Write
and post an entry permit to address all hazards
Ensure
all team members are trained on confined spaces.
Prevent
access to anyone who is unauthorized to enter
Set
up emergency rescue systems such has a Tri-Pod rescue system, or a horizontal lifeline.
Identify
roles and responsibilities of everyone involved (entrant, attendant, rescue, supervision
etc)
Use
additional PPE as needed
Set
up a communication method between the entrant and attendant
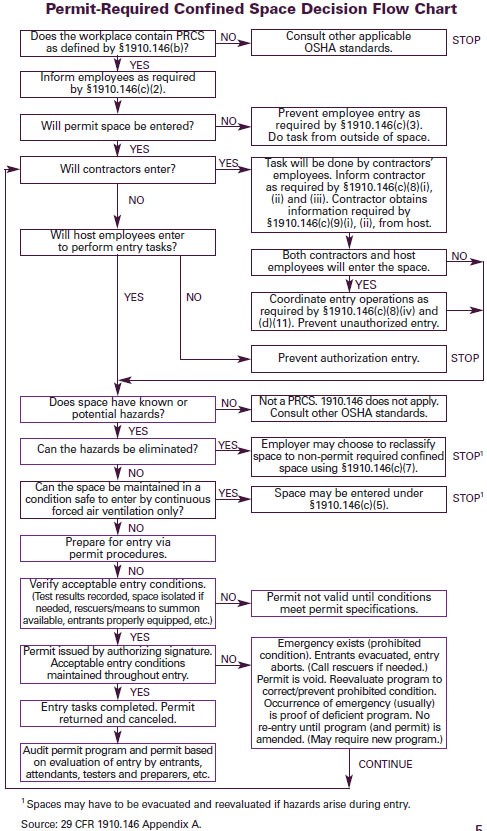
Here is a flow chart on how to determine
if your space is a Permit Required Confined Space!
Additionally if
your company/business provides self-rescue in any situation OSHA mandates CPR training
be conducted. See 1910.146(k)(2)
Schedule training
for your company today!
https://dev.b42l.com/business-scheduling/
Looking back on
it now, we really put Super Mario in a ton of grave danger. Imagine waking up
one day, turning on your game system and all it says was, “Super Mario died due
to confined space entry accident”. Don’t cut your life short. In the real world
we don’t get three lives before the game is over. For full guidelines of confined
spaces refer to CFR 1910.146.
While most of us learned our ABC’s in kindergarten, I am a firm believer in repetition and relearning as we grow. Relearning the alphabet for fall protection is something I learned early on as a safety professional.
So what exactly is the ABC’s of fall protection? The ABC’s of fall protection is a simple way to remember the components of fall protection and what to look for when inspecting fall protection before working from heights.
What are the ABC’s of fall protection? (Don’t worry, this alphabet only includes 3 letters.)
Anchorage Point
Body Harness
Connecting Device
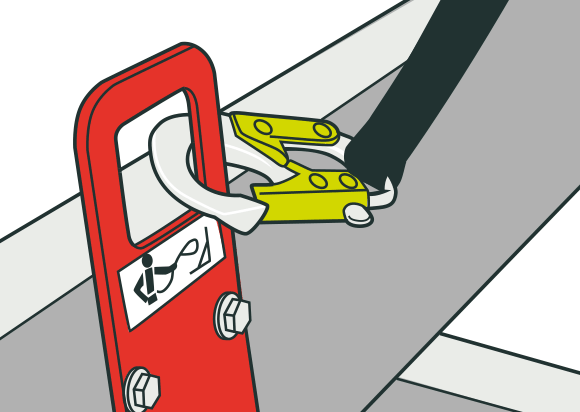
(A)Anchorage Point
The anchorage point is the item you are tying off to. According to OSHA only approved anchorage points can be used to tie off to. This anchorage point must be able to support 5,000 lbs of force per employee. So, that piece of conduit hanging from the ceiling in your basement probably isn’t the best thing to tie off to if you need to change a light bulb. You can not tie off to handrails or mid rails! In man lifts for example, there are designated approved anchorage points that the manufacture will identify to the operator.
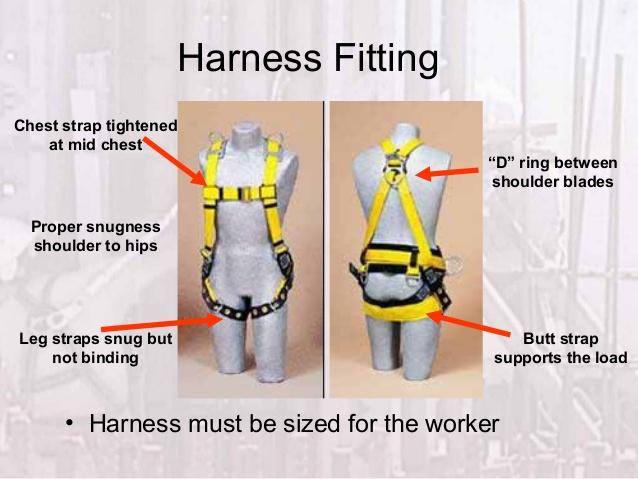
(B) Body Harness
Second for the Fall Protection ABC’s is Body Harness. All harnesses are different. When inspecting your harness there are some key things to look out for. Fit your harness for your body specifically. No sharing!
Inspect the webbing for rips, cuts, and tears
Look at the hardware of the harness for rust, burns or cracks
Verify the tag of the harness for the harness’s capacity.
Store your fall protection in a designated area away from all other tools and out of weather/direct sunlight. If your harness is damaged, immediately take it out of service and notify others to not use it. Make sure to fit your harness for your build and body frame. The D-Ring should be between your shoulder blades, chest strap right at the mid chest line, and leg straps should allow 2 fingers in-between, so it is not too loose or too tight.
(C)Connecting Device
The last letter of the Fall Protection ABC’s is C” for Connecting Device. There are typical 2 types of connecting devices
Lanyards
Self-retracting devices
When selecting a connecting device, you need to understand your working height. See the link below for the best way to select your connecting device.
Slips/Trips/Falls are the number 1 leading cause of fatalities, and injuries in both constructions, and in general industry. According to the National Safety Council, in 2016, 697 workers died from falling to another level. In addition, a whopping 48,000 workers were injured from falls, that required days off of work.
The OSHA standard for fall protection for construction is 6ft. For general industry, the standard says 4ft. In both construction, and in general industry, working from heights is a daily activity. Some examples of working from heights are:
Leaning edges such as stairwells
Rooftops
Working from ladders
Performing work from man lifts or scissor lifts
Open holes/trenches
Standing on top of tanks, vessels, or storage containers to work
Walking on or working from catwalks
What areas does your company work at?
Any time you are working from heights, remember the ABC’s of fall protection. All falls can be prevented. If you see another coworker working from heights unprotected, utilize Stop Work Authority, and correct the behavior. For tips on how to utilize Stop-Work Authority, see our separate blog post:
The easiest way to avoid a fall, is to prevent it from taking place. Below are some systematic approaches to preventing fall hazards.
Identify Fall Hazards
As you arrive to the job site, conduct a safety walk around and identify all areas where you are working from heights. Be sure to also identify other fall hazards such as wet/slippery surfaces, changes in elevation, and housekeeping issues such as loose extension cords, or building material. Discuss fall hazards on your JSA and make sure all crew members are aware of the areas they may be working in.
Eliminate
After you have identified all fall hazards try to eliminate the fall hazard. Examples of eliminating fall hazards include: installing guard rails around leaning edges, cleaning up spills, ensuring ladders are in good working order, covering open holes, and maintaining good housekeeping.
Fall Protection
Fall protection should be the last resort if fall hazards can not be removed from the workplace. Inspect all equipment and make sure all team members are trained on how to properly fit their harness. Calculate your working height, and select the appropriate connecting device. Pick your anchor point, and verify it is able to withstand 5,000 lbs. Want practice? Try the game Harness Hero available on the App Store and Google Play Store for FREE! This App walks you through different scenarios and shows you the outcomes of what a fall will look like after you select your fall protection. Below is a video showing how the Game works! Challenge yourself and try it out!
As a Recap
We understand the severity of fall hazards. We also understand how to eliminate fall hazards and how to mitigate them if the hazard can not be completely eliminated. The next time you are expected to work from heights say your fall protection ABC’st It could save you!
Did this article help? We hope this toolbox talk was informative, helpful and easy to relate to. Please visit B42L.com to learn more about strengthening your safety resume and other safety topics to improve your company’s safety culture.
“Oh, the weather outside is frightful, but the fire is so delightful. And since we’ve got no place to go, let it snow, let it snow, let it snow!” The cold winter months and frigid temperatures are here for most of us. It is time to get prepared for the worst. Below are the two most prevalent winter related emergencies to be prepared for this snowy season.
Frostbite
Don’t get bit by Jack Frost this winter. Our first Cold Related Emergency to be prepared for this winter is frost bite. Frost bite is caused by exposure to extreme cold temperatures for an extended period of time. Frostbite causes tissue just below the skin to freeze. First onset signs and symptoms of frostbite include:
Prickling feeling of the skin
Numbness
Red, white, blue, and grey-yellow looking skin
Muscle tightness
Blistering in severe cases
Vulnerable Areas
When the body is exposed to cold temperatures, the natural reaction is for blood to rush to the torso to protect target organs. Because of this, several areas of the body are left highly vulnerable to frostbite including:
Fingers
Toes
Ears
Nose
Cheeks
Treating Frostbite
Recognizing these signs and symptoms is the first step to treating frost bite. If you or someone else is exposed to cold temperatures, it is important to immediately get the individual to a warmer area. Look for discoloration in vulnerable areas, and immediately remove damp or wet clothing such as gloves, socks, or hats. Replace the affected areas with dry and warm towels or blankets.
Discourage skin to skin contact for rewarming as this can cause blistering. Do not pick any scabs or blisters as this will damage the skin worse.Gradually increase the individuals body temperature and monitor the individual for changes in behavior. If the skin does not appear to be improving, seek further medical attention.
Hypothermia
Our second cold related emergency to be prepared for this winter is Hypothermia. Hypothermia is an extremely dangerous drop in body temperature. It is also usually caused by an excessive exposure to cold temperatures, but it does not take long to slip into hypothermia.
The normal body temperature averages 98.6 degrees. In cases of hypothermia, the core body temperature drops below 95 degrees and in severe cases it can drop below 92 degrees.
What Causes Hypothermia?
During cold temperatures the body must work harder to maintain its normal body temperature (98.6 degrees). While exposed to cold temperatures, heat loss occurs, mainly through natural breathing (exhaling) and radiation (increases from exposed skin to moisture).
If you are exposed to cold temperatures for an extended period of time, larger amounts of heat loss is likely to occur. The organs that normally produce body heat begin to slow down and move into “shut down mode” as a defense mechanism to protect the brain. It is vital to understand how to recognize the signs and symptoms of Hypothermia before it’s too late. When hypothermia kicks in, it can quickly become deadly.
Symptoms of Hypothermia
Extreme Shivering
Confusion
Glassy stare
Heavy fatigue
Grey skin
These signs and symptoms will normally begin with the shivering of arms and legs. As blood rushes to the torso to protect target organs, the arms and legs are now left with minimal amounts of warm blood. Shivering is the body’s natural response. The muscles of the arms and legs begin to rapidly contract in effort to redirect blood back to these areas.
If shivering is stops and the person is still in the cold temperatures, check for other symptoms. The person might be confused and have a glassy stare. If other symptoms exist, the person may be entering into hypothermia.
Lastly, their skin may have a grey appearance and they may become extremely fatigued. The grey skin tone, could indicate a lack of blood flow and fatigue would also imply the person is burning large amounts of energy quickly.
How to treat Hypothermia?
Hypothermia can quickly accelerate and is a potentially life-threatening condition. If you suspect someone is suffering from this Cold Winter Emergency here are some steps to take for treating it.
Remove all wet clothes and replace with dry towels or blankets.
Refrain from putting on jackets, or other sweatshirts. Hypothermia can lead do unresponsiveness. Towels and blankets are easy to remove if the person becomes unresponsive.
Gradually warm the person. Refrain from placing the person in a hot shower or a hot tub. Rapid warming methods can send the person into shock. Instead, gradually warm the person with small heaters.
If symptoms continue for 15-20 minutes and are not getting better, call 911 or the designated number.
Continue to monitor the person’s signs and symptoms and be prepared to give CPR if you are trained.
How to avoid Frostbite and Hypothermia this Winter
The easiest way to prevent Frostbite and hypothermia is to avoid extended periods of cold temperature exposure. If you work outside or are exposed to cold temperatures for longer periods of time, here are some other tips to prevent frostbite and hypothermia.
Layer Up
Checking the weather forecast the night before is the easiest way to stay prepared. Lay out your outfit the night before and don’t hesitate to break out the puffy jacket. It may lack on style, but it will keep you warm. We also recommend carrying a hat and gloves as we just learned ears, and fingers are vulnerable areas to frostbite.
Change your route
If you live in a city and walk to work, avoid the scenic route to the office this winter. Changing your route and taking the shorter 5-minute stroll could pay up big time and reduce the amount of heat loss you experience.
Pack Extra
Making that long haul to see the in-laws? Packing an extra set of warm clothes, and a blanket in could be the difference of beating the cold if the car breaks down. Emergency car kits exist for longer hauls.
Here are a few places to go to find cold related emergency kits and safety items!